“Good morning! I was looking for a class to take with my mother-in-law… in early March and didn’t know if you were offering one?! It’s her birthday and it’s been some time since both of us have dusted off our machines.”
Back in early 2019, I received the above email and thus began my first pet portrait class.
Emails flew back and forth as we ironed out details. I talked about my teaching style. While they would work from a photo, they would be layering instead of piecing and they’d make their “pattern pieces” from the enlarged photo or freehand. Since some people feel they cannot sew without pre-printed pattern pieces, I make a point of explaining this. Sometimes a student’s feelings of “I can’t do this” are so overwhelming that while the individual may have a great vision, they just can’t make that first experimental cut into the fabric.
Leah was thrilled since she had always wanted to try fabric art and was happily discussing possible pets for her portrait. The more emails we sent back and forth, the more excited she got. “… (this) out of the box opportunity was just too great to pass up!!” She shared that her mother-in-law might be a bit hesitant as to whether or not she could do this new art form. I said something to the effect of between the two of us, she’ll be fine.

Their photos enlarged and pinned on my design wall, waiting for them when they arrived.
Pet Portrait Class Preparation
The list of supplies and tools for the day was emailed. I requested the photos they were considering as reference photos ahead of time so I could see if there was anything that might be too advanced for a first attempt.
“So as you are thinking of what photo you’d like to recreate in fabric, try to first pick one that “speaks to” you. It could capture a certain look of your pet or just have a special memory. The clearer the picture is, the easier it will be to work with… however, we can work with ones that aren’t that clear if we have other photos to reference.”
Knowing their choices prior to class day allowed me to get the photos enlarged. I pulled out class material from years ago when I was teaching Beginning and Intermediate Fabric Art Quilts at Saratoga County Adult Continuing Education, reworked some of it, and into folders it went.
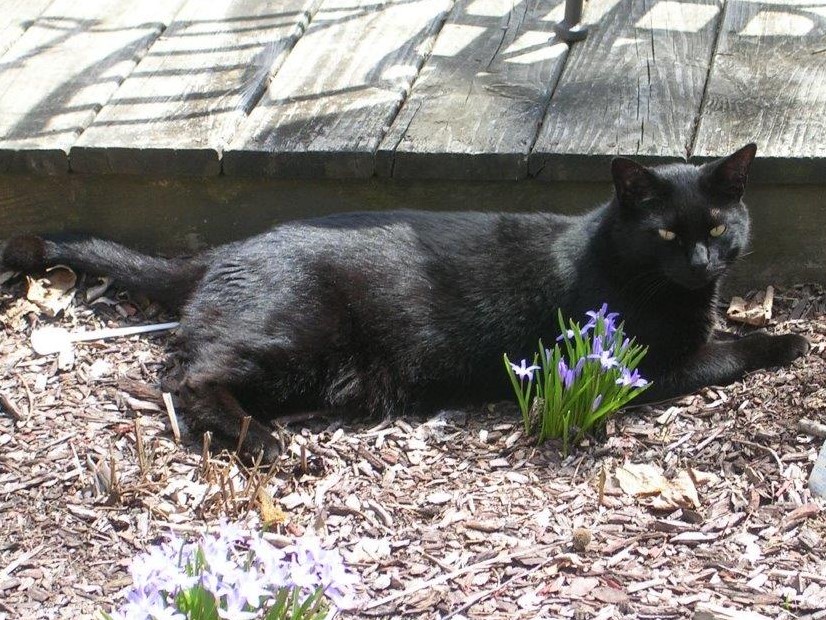
Betsy and I had a number of emails discussing her reference photo possibilities. Irises, sunsets, or her Mickey. While she wasn’t confident that she could make a black cat out of fabric look anything like her Mickey, I had enough confidence for both of us, so Mickey it was. The fact that Mickey was transitioning through that end-of-life time of his life added a poignant dimension to the whole process.
“So, just something to be aware of, as you choose colors for your picture when you are here with me, go for what speaks to your heart/ soul. It’s okay to cut fabric up, put it down, and if something isn’t right, take that fabric off and cut up something else. And then something else… and then go back to the first one. I call it ‘auditioning’ the fabric.”
The day before Betsy wrote: “She (Leah) is so much fun and we have a great time when we are together. This class will be so much fun with the 3 of us!!!” It’s nice knowing one’s students are excited before we even start.
Fabric Art Creation Day
This mid-February day began (and ended) with no snow, so that was a joy. Leah was coming down south 3 hours and Betsy had to come over the mountain, which can be treacherous in winter storms. The day began with setting up their machines, followed by information about different techniques, and then the making began. Pet portraits can be made as wall hangings, mounted on canvas, or as pillows. They both chose to make theirs as wall hangings.
Similar to what is in my blog post, Making a Fabric Pet Portrait: Cooper’s Memorial Pillow, the second copy of the enlarged photo was cut out in muslin for the base. Each part (ears, jaw, face, mane) was also cut out to be the pattern for that particular area.
What always is interesting to me is to watch the approach individual students take when they begin to add color on top of that muslin base. Some approach it with abandon, quickly rummaging through their fabrics, choosing what feels right quickly and cutting away with the scissors; others lay out all the material choices around the base, move them around a number of times, step back, make some changes and even then, hesitantly make that first cut. Both styles were present in this daughter/ mother-in-law pair.
Leah worked on her horse, Moon. She had initially written to me: “I have an old man (27 years young) black (graying though) horse who I’ve owned for 22+ years and was thinking of maybe doing something of him. I didn’t know how difficult doing a BLACK animal would be though.” I had sent them photos of different completely black animals I had done and I suspect that helped move the needle. She wanted to have it be whimsical and magical as this gentle creature exudes that essence. Her material choices reflect that vision.


Note how the fabric choices portray the fanciful nature of her horse
For Mickey, I recommended that Betsy start with the head and eyes first. Often just having a complete face cut out allows students to go forward with more conviction and confidence.
We talked about how to get the shine in his coat from different black fabric, how to show the contours of his body through patterns in the material, and how taking a photo of the work helps one see what sometimes is missed with your eyes.

The first draft of Mickey pinned. Notice how the pattern in the face material adds depth to his face.
Both Leah and Betsy worked diligently through the morning. Leah and I had previously arranged to have a luncheon meal here due to the fact it would save time and it was Betsy’s birthday weekend. Leah brought soup and bread; I made salad and had some cupcakes from my daughter, Fancy Pants Cakes. The food break served them well, and then they continued their cutting and Leah began sewing her art piece.


Leah sewing her pet portrait, and Betsy practicing the machine applique stitch.
Since Betsy wasn’t sure what she wanted to do for her background, I had her practice the blanket stitch on a flower shape that I had left over from my previous classes.
Creating the Pet Portrait Background: Six Months Later
I received an email from Betsy wondering if she could come over to work with me on the background for Mickey. She had some ideas, yet she wasn’t sure whether or not the colors worked well enough. So over the mountain she came with a basketful of material and Mickey, the fabric Mickey, that is.
Betsy spoke of how during these months she had received compliments from friends and co-workers on her portrayal of Mickey. A number of them had encouraged her to finish it. “It’s going to be amazing!” they said.
Betsy knew she wanted her cat to be outside on grass with a soft sky in the background. She auditioned a number of grass materials. We dug into my scrap drawers and fabric bins to add to her sky options.
Watching Betsy cut out the strips for the sky brought a smile to my face as there were no patterns for the layers of the atmosphere, just freehand cutting. She was doing what six months ago seemed impossible and doing it well. Most importantly she felt good about her progress.

Mickey in the grass at sunset.
A Finished Pet Portrait: Mickey at Home
Almost a year from when we had the class, I received the photos below. Mickey was finished and had his place of remembrance and honor in Betsy’s new house.


Musings on Fabric Art
I know how challenging it can be for people new to art quilts and fabric collage to overcome the mindset gremlins. I have been there.
There was a time in my art and business journey when I had convinced myself:
I couldn’t put colors (fabric) together correctly.
Without any formal art training, my work would never be good enough.
I wouldn’t learn to create pets that look real enough.
I couldn’t paint eyes or noses.
I couldn’t do Instagram, create a monthly newsletter, or write a blog.
What I found out over time:
I can combine colors together well when I listen to the fabric speaking to me.
I can view fabric with different eyes, seeing shapes within patterns and colors.
My skill set improved through practice and the many portraits I created.
Practice works.
I enjoy writing/sharing my art journey, observations, and techniques with others.
A joyFULL art piece is as valuable as one that is technically correct
When you create from the heart, it all falls into place.
These days when there is something new for my business, my phrase is “ I haven’t learned how to do that YET.” And when those “You Won’t Ever Be Able to Do That, Martha” gremlins come marching up to my door, I invite them in, acknowledge the fear and doubt that surrounds them, and send them on their way gently with a “Oh but I will. I will learn it over time. You don’t need to protect me from failure. It won’t be perfect at first and I will keep improving the more I do something.”
I can hear the Pinterest gremlins in the distance. I am armed with my “I haven’t learned Pinterest, YET” shield.